Conferences
Conferences, events, meetups all come together here
At the heart of SpreaView are conferences, the events where sessions take place, speakers present, and evaluations are collected. Whether you’re organizing a local meetup, a multi-day conference, or a recurring event, SpreaView helps you structure and manage feedback collection effectively.
This section of the documentation will guide you through everything related to conferences, including how to:
- Create a new conference within an organization
- Configure key properties such as session duration, review windows, and topics
- Link your event with external systems like Sessionize
- Manage evaluations, feedback visibility, and customization options
- Invite others to collaborate on your conference setup
The Role of Conferences
Conferences are always created within an organization, allowing teams to collaborate on event planning, session setup, and speaker evaluations. Each conference can be customized to fit the specific needs of your event, from branding to evaluation policies.
A single organization can host multiple conferences, making it easy to manage separate events under a single collaborative umbrella.
What You’ll Find in This Section
Getting Started
If you haven’t already created an organization, head to the Getting Started Guide to set one up first—since every conference must be part of an organization.
Ready to begin? Start with Creating a Conference to launch your first event in SpreaView.
Would you like a version of this page that includes visual examples or a table of contents with collapsible sections?
1 - New conferences
Creating a new conference, quickly and easily
Before you can collect speaker evaluations in SpreaView, you need to create a conference. All conferences are created within the context of an organization, which acts as the umbrella for your events.
Prerequisite: Select the Right Organization
Every conference belongs to an organization. If you’re part of multiple organizations, make sure you are working under the correct one.
- Use the cog wheel icon in the top-right corner of the screen to switch organizations.
- The current organization is always shown next to the cog wheel for reference.
You can only create a conference if you are assigned to at least one organization.
Creating a New Conference
Once you’re in the correct organization context, follow these steps to create a new conference:
- Go to the Conferences section in the sidebar.
- Click Create.
- Fill in the required details (see below).
- Click Save to create your conference.
When setting up a new conference, the following details are mandatory:
1. Event Name
The official name of your event or conference (e.g., Tech Summit 2025). This name will be visible in dashboards and reports.
2. Date Range
Select the start and end date of your conference.
- For a one-day event, simply select the same date twice.
- The date range determines when sessions can be scheduled.
3. Default Session Duration (in minutes)
This value is used when manually adding sessions later.
- The default value is 50 minutes.
- The end time of a session is automatically calculated by adding this duration to the session’s start time.
- Example: If the default is set to 45 minutes, a session starting at 10:00 will end at 10:45 by default.
4. Default Review Window Duration (in hours)
This defines how long each session can be reviewed after it starts.
- The default value is 4 hours.
- Example: If a session starts at 14:00 and the review window is set to 4 hours, attendees can submit evaluations until 18:00.
2 - Details
Change conference properties at any time
After creating a conference in SpreaView, you can access its details page to manage and fine-tune various settings. This page includes all the basic information you entered during creation, as well as advanced configuration options that help tailor the evaluation experience to your event.
Basic Properties
These are the core fields shown both during creation and on the details page:
- Event Name: The title of your conference or event.
- Date Range: Start and end dates of the event. For a one-day event, both dates are the same.
- Default Session Duration: Default session length (in minutes), used when adding sessions manually.
- Default Review Window Duration: Default time window (in minutes) during which a session can be reviewed after its scheduled start time.
Additional Properties
The Conference Details page reveals a number of additional fields that allow more customization and control over your event’s configuration.
Event Code
A unique identifier for your conference, automatically generated by SpreaView. This code is used internally and can also be referenced in integrations. This code is read-only and cannot be changed.
Event Description
An optional text field where you can provide more context or information about your event.
Conference Topics
Define a list of topics relevant to your event (e.g., AI, Web Development, Cloud). These can be assigned to sessions to help categorize them and analyze feedback across different themes.
Sessionize API ID
If you’re using Sessionize to manage your speaker and session data, you can link it here by providing the Sessionize API ID. This enables automated session import and syncing.
Swag Requirement Threshold
Specify the amount of sessions conference attendees must review to qualify for a prize draw *
Theme
Apply a visual theme to your conference’s evaluation forms and speaker pages to align them with your event branding.
*) To make the prize draw work, attendees must leave their name and review at lease the set amount of reviews. So setting up a prize draw with raising the threshold above 0 does not make sense if you don’t enable requesting an attendee name
Evaluation Options
These toggles control the behavior of the session evaluation forms and speaker feedback pages:
When enabled, a free-text comment field is added to the evaluation form, allowing attendees to leave qualitative feedback in addition to star ratings. When enabled, the free comment field is shown on review pages. The comment field will always be optional and cannot be configured to be mandatory.
Request Reviewer Name
Enable this to optionally ask attendees to provide their name when submitting a review. This can encourage accountability and personalized feedback, but remains optional for the reviewer. Reviewers will be progressively asked for their name once. When ignored, reviewers will not be bothered again, instead they can enter or change their name manually.
Show Session Ranking on Speaker Review Page
This setting controls whether a speaker can see how their session ranks compared to others at the conference. If enabled, the speaker report will display relative performance metrics.
Editing and Saving Changes
To edit any of the conference details:
- Navigate to your organization’s Conferences section.
- Select the desired conference.
- Update any fields or toggle settings as needed.
- Click Save to apply your changes.
3 - Speakers
Speakers are one or more persons delivering a presentation on your conference
In SpreaView, speakers are a fundamental part of every conference. They are linked to the sessions they deliver and are the primary recipients of evaluation feedback from attendees. This documentation page explains how speakers work, how they are managed within conferences, and how SpreaView handles speaker data across events.
How Speakers Work
SpreaView treats speakers in two ways:
- Per-conference: Speakers are added to individual conferences and assigned to sessions within that context.
- Globally: Speakers are also tracked centrally across all conferences, allowing each speaker to have their own dashboard showing feedback and sessions from multiple events.
This makes SpreaView especially useful for recurring speakers and multi-event organizations.
Adding Speakers to a Conference
Before you can assign a speaker to a session, you must first add them to your conference.
To add a speaker:
- Go to the Speakers section within your conference.
- Click Add Speaker.
- Enter the speaker’s name and any relevant details.
- Save your changes.
Once a speaker is added to the conference, you can assign them to sessions and track their evaluations.
⚠️ You cannot assign a speaker to a session unless they are part of the conference.
Importing Speakers Automatically
If you’re using an external system like Sessionize to import sessions, SpreaView will:
- Automatically create speaker entries in your conference for any speaker linked to an imported session.
- Ensure that speakers are properly associated with their sessions without requiring manual setup.
This saves time and reduces the risk of data entry errors when working with large numbers of sessions.
Speaker Dashboards
Speakers can log into SpreaView to access their personal dashboard, which includes:
- A list of their sessions across all conferences they’ve spoken at
- Session-level ratings and evaluation breakdowns
- Optional free-text comments (if enabled by the organizer)
- Rankings and performance comparisons (if enabled by the organizer)
This centralized feedback experience makes SpreaView a powerful tool for speaker growth and session refinement.
Summary
- 🧑🏫 Speakers belong to conferences and are assigned to sessions.
- 🌐 SpreaView maintains a central speaker record so speakers can view all their sessions in one place.
- 🔄 Speakers are added automatically when importing from external sources like Sessionize.
- ✅ Speakers must be added to a conference before assigning them to sessions.
Next: Managing Tracks
4 - Tracks
Physical locations where presentations are hosted, also referred to as rooms.
Tracks (also referred to as rooms) represent the physical locations where sessions take place during a conference. Every presentation in SpreaView must be assigned to a track, as this ensures that session reviews can be tied to the correct location and schedule.
Why Tracks Matter
Tracks are more than just room names—they are a foundational part of how SpreaView helps organizers gather and manage feedback. They provide:
- Structure for session scheduling
- Location context for attendees and organizers
- Track-specific QR codes that link attendees directly to the review page for the currently running session
Creating Tracks
Before you can add presentations or sessions to your conference, you must first create at least one track.
To create a track:
- Go to the Tracks section in your conference dashboard.
- Click Add Track.
- Enter the name of the track (e.g., “Room A”, “Main Hall”, “Track 1”).
- Save your changes.
Once created, tracks can immediately be assigned to sessions.
⚠️ Presentations cannot be created or imported without at least one track.
Automatic Import of Tracks
If you’re importing sessions from an external source (such as Sessionize):
- SpreaView will automatically create tracks based on the rooms or tracks defined in the external system.
- Sessions will be automatically assigned to the appropriate tracks during the import process.
This ensures consistency and saves time, especially for large-scale events.
Track-Based Review QR Codes
One of the powerful features of SpreaView is the track-specific QR code:
- Each track has its own unique URL and QR code.
- When scanned, the QR code leads attendees to the currently active presentation on that track.
- When a new presentation starts on the track, the URL automatically switches to the new presentation’s evaluation page.
This enables organizers to:
- Print and place track-specific QR codes in the physical rooms.
- Let attendees review presentations in real time, without needing to search or navigate manually.
🖨️ Many organizers choose to print QR codes for each track and place them on walls, doors, or presentation screens.
Summary
- 🏛️ Tracks represent rooms or areas where sessions happen.
- 🧭 A session must be assigned to a track.
- 🔁 Tracks and assignments are automatically imported when using external systems.
- 📱 Each track has a dynamic QR code that always points to the current session.
5 - Presentations
Presentations are delivered by speakers on a given track ;)
In SpreaView, presentations (or sessions) are the core content of any conference. They are what attendees experience and review, and what speakers are evaluated on. Presentations are always part of a conference and must be properly configured to ensure accurate scheduling and meaningful feedback collection.
Presentation Overview
Each presentation in SpreaView includes the following:
- Title – The name of the session or talk.
- Abstract – A brief description or summary of the content.
- Presentation Code – A unique, read-only identifier automatically assigned to each presentation.
- Speakers – One or more speakers associated with the session.
- Track – The room or location where the session takes place. Assigning a track is mandatory.
- Start and End Date & Time – The scheduled time for the presentation.
All these fields work together to ensure attendees can review the correct session and that speakers receive timely feedback.
Required Fields
To create a presentation, you must provide:
- A title
- At least one speaker
- An assigned track
- A start time and end time
⚠️ A presentation cannot be created without assigning a valid track and at least one speaker.
Review Time Windows
Review availability for presentations is automatically determined by your conference settings:
- Each conference defines a default review window duration (e.g., 4 hours).
- The review period starts at the session’s scheduled start time and ends after the configured duration.
- This ensures attendees can leave feedback in a timely and relevant window after attending a presentation.
Speaker Feedback Access
All speakers assigned to a presentation can:
This helps speakers improve their sessions and gain insight into how their talks are received by attendees.
Summary
- 📄 Presentations contain a title, abstract, and unique code.
- 🧑🏫 They must have at least one speaker and be assigned to a track.
- 🕒 Sessions have scheduled start and end times.
- 📝 Feedback windows are calculated automatically based on conference settings.
- 📊 All assigned speakers can view feedback via their speaker dashboard.
6 - Sessionize
Importing data makes life easier
SpreaView allows you to seamlessly import speakers and sessions directly from Sessionize, a platform used for selecting and planning sessions for your conference. This integration simplifies the process of transferring your carefully planned schedule into SpreaView, ensuring that all sessions and speaker information are accurately reflected in your event.
Steps to Import from Sessionize
Plan Your Sessions in Sessionize:
- Begin by using Sessionize to plan and organize your conference sessions. Utilize the Sessionize schedule builder to arrange your sessions and assign speakers to each one.
- Once your schedule is finalized and announced, it’s ready to be imported into SpreaView.
Create an API Key in Sessionize:
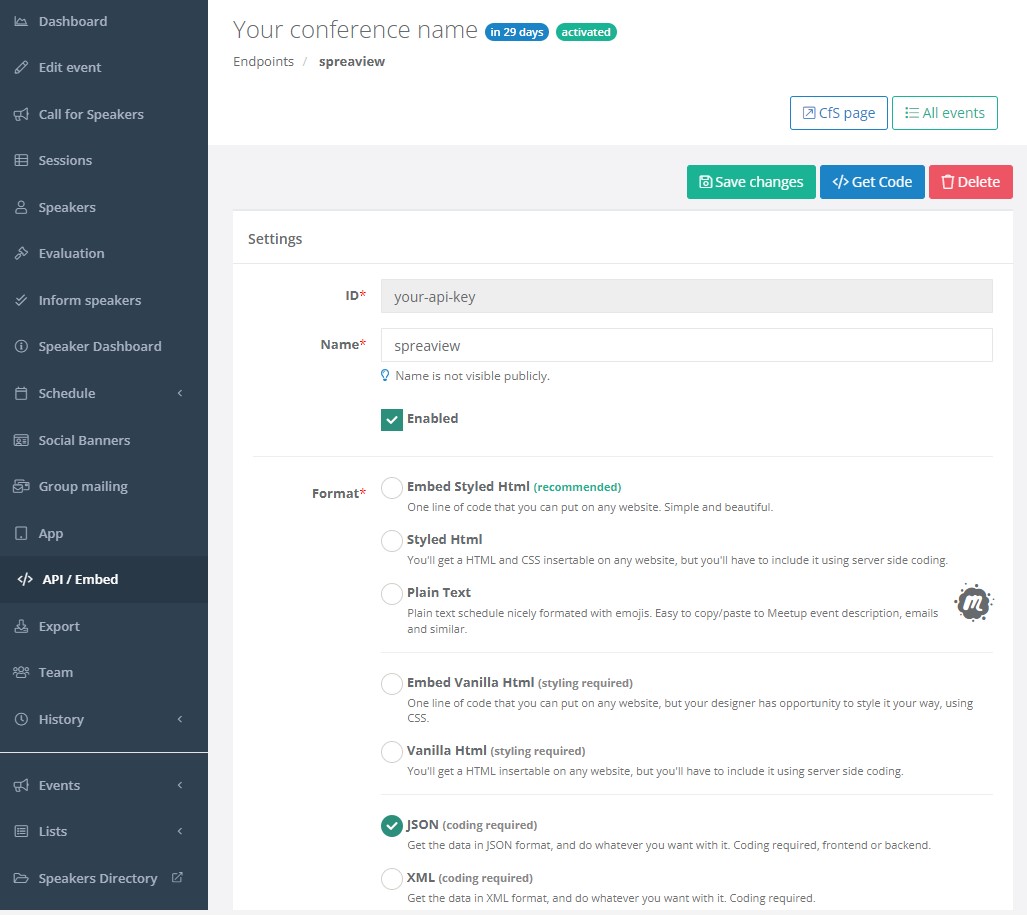
- To enable the integration, you need to create an API key in Sessionize. This API key will allow SpreaView to access your session data securely.
- Log in to your Sessionize account and navigate to the API/Embed settings.
- Create a new API specifically for SpreaView. Keep this key secure, as it grants access to your event data.
Importing Data into SpreaView:
- In SpreaView, go to the section where you manage your event.
- Locate the field where you can enter the Sessionize API ID.
- Enter the API key you created in Sessionize when prompted.
Import Data:
- When a Sessionize API Id is specified for your event, a new button appears called ‘Sync with Sessionize.com’. Click it to import data
- After the import process, review the sessions and speakers that have been brought into SpreaView.
- Ensure that all the information is accurate and complete. You may need to adjust session details or speaker assignments within SpreaView based on your specific event needs.
You can import data multiple times. Speakers and sessions will only be changed if changes are made in the Sessionize platform.
Managing Imported Sessions and Speakers:
- Once imported, the sessions and speakers will be fully integrated into your SpreaView event.
- Please note that any changes to session details or speaker information should be made in Sessionize and then re-imported into SpreaView to ensure consistency.
Important Notes:
- API Key Security: Keep your API key confidential, as it provides access to your event data in Sessionize.
- Synchronization: If changes are made in Sessionize after the initial import, you’ll need to re-import the data into SpreaView to capture these updates.
- Sessionize Control: Since sessions and speakers are managed primarily in Sessionize, any edits to their details should be done through the Sessionize platform rather than directly in SpreaView.
This integration ensures a smooth transition from planning your event in Sessionize to executing it in SpreaView, helping you focus on delivering a successful conference.
7 - Insights
Get information based on the topics of sessions
Configuring Topics for Your Conference
SpreaView allows conference organizers to define topics that categorize sessions based on their content. This feature is especially powerful when used in combination with a license that includes AI-powered analysis.
🎯 Why Use Topics?
Adding topics to your conference provides you with deeper insights into:
- Which topics attracted the most attendees
- Which topics received the highest or lowest ratings
- How your session content aligns with attendee interests
This helps you make informed decisions when planning future editions of your event.
Not that this feature works best when providing SpreaView with a list of 20 to 30 topics for your conference. This feature will not work when 10 or less topics are provided.
🧠 AI-Assisted Topic Classification
If your conference uses a Professional or Premium license (both of which support AI features), SpreaView will:
- Analyze the abstracts of all presentations.
- Match content with the topics you’ve defined.
- Automatically assign topics to sessions where matches are found.
🔍 This means you don’t need to manually tag each session—SpreaView’s AI does the heavy lifting.
📌 How to Add Topics
- Navigate to your Conference Details page.
- Locate the Topics section.
- Add one or more topics relevant to your event.
(e.g., Cloud Architecture, AI & ML, DevOps, Frontend Design)
Once defined, these topics will be used by SpreaView to classify your sessions intelligently.
📊 Benefits of Topic Analysis
With topics set up, SpreaView can provide:
- Topic popularity: based on number of sessions and attendee feedback
- Engagement metrics: which topics got the most reviews or highest scores
- Balanced programming feedback: helping you plan for future content diversity
This dramatically improves your post-conference evaluation process and helps guide the programming of your next event.
💡 Pro Tip
For best results:
- Choose topics that are broad enough to group multiple sessions, but specific enough to provide meaningful insight.
- Regularly review topic usage and AI categorization results during your schedule-building process.
8 - Prize draws
Gamification works! Let’s encourage attendees to leave feedback
To help boost attendee engagement and increase the number of session reviews, SpreaView offers a Prize Draw feature. This feature allows organizers to incentivize attendees to leave feedback by offering a chance to win a prize.
How It Works
When enabled, the Prize Draw feature automatically tracks which attendees qualify based on two criteria:
- They have left feedback for a minimum number of sessions.
- They have entered their name when submitting feedback.
At the end of your event, you can easily run a random draw to select winners from all qualifying reviewers.
Enabling the Prize Draw
To set up a prize draw for your conference, go to the Conference Settings page and configure the following:
1. Swag Requirement Threshold
- This is the minimum number of reviews an attendee must leave to qualify.
- Set this value to any number greater than 0 to enable the prize draw.
- For example, if the threshold is set to
5, only attendees who submit feedback for at least 5 sessions will be eligible.
2. Ask Attendees for Their Names
- This option must be enabled to collect identifiable names with the feedback.
- Without a name, reviewers cannot be included in the draw.
⚠️ Both settings must be enabled. If the swag threshold is 0 or name collection is turned off, the prize draw feature is not available.
Running the Prize Draw
Once your event has ended, you can initiate the prize draw:
Go to the Conference Details page.
Click the “Prize draw” button (visible only if the feature is enabled).
SpreaView will randomly select one attendee from the list of those who:
- Provided a name.
- Left at least the required number of reviews.
The result will show:
- ✅ The attendee’s name — which can be called out on stage.
- 📱 A QR code — which the attendee can scan to confirm their win and identity.
This makes it easy to verify winners live, on-site.
Note that SpreaView values anonymous feedback and thus all entered feedback cannot be tracked back to an individual. There are scenarios where scanning the QR code returns a negative result. Although this should not be a common scenario, organizers must realize it is indeed possible.
Benefits of Using Prize Draws
- 🚀 Encourages more session reviews
- 🎉 Adds a fun, engaging element to your event
- 📣 Allows organizers to highlight and reward active attendees
- 🔒 Ensures fair selection and easy verification with QR codes
Summary
- Set a Swag Requirement Threshold (>0) to enable the prize draw.
- Enable “Ask attendees for their names” in the conference settings.
- After the event, use the Prize draw button on the conference details page to select a winner.
- SpreaView displays the winner’s name and a QR code for on-site verification.